How to Inspect and Repair Oil Leaks( Part One )
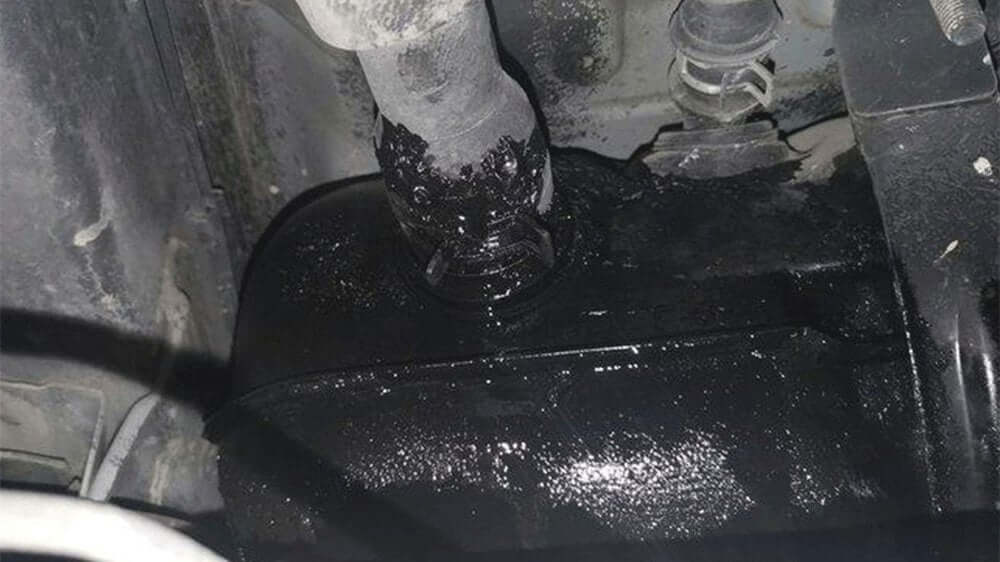
Oil leaks are not to be underestimated. Even minor leaks can lead to oil wastage, while severe leaks can affect the lifespan of various components and even pose a safety risk. For the entire vehicle structure, which areas are prone to oil leaks, and how should we address them when they occur? Today, we will focus on two of the most common systems: the engine and the transmission.
Engine Oil Leak
Symptoms:
- Mild Leaks: Visible oil stains around the leak area.
- Severe Leaks: Obvious oil stains and accumulation of oil sludge around the leak area.
- Critical Leaks: Oil droplets visible on the ground in a short time.
Hazards:
- 1. Mild leaks usually do not cause immediate harm to the engine.
- 2. Severe leaks can cause corrosion to nearby components (such as heater pipes and rubber hoses).
- 3. Critical leaks can lead to insufficient oil, reduced oil pressure, impaired lubrication, and potential engine damage.

1. Valve Cover
Inspection: Check the valve cover gasket area and ignition coil mounting points for visible oil stains. Inspect around the various adjustment valves on the valve cover. Oil leakage here typically indicates a faulty valve cover gasket or related seals.
Repair: Identify the leak area and replace the valve cover gasket and any related seals. Apply a suitable amount of sealant to the gasket before installation. Ensure proper installation and torque the bolts from the center outwards in multiple steps.

2. Timing Cover (Timing Chain Cover)
Inspection: Examine the joint between the timing cover and engine block for visible oil stains.
Repair: Replace the timing cover gasket.

3. Vacuum Pump
Inspection: Look for oil stains and oil sludge around the vacuum pump mounting surface. Leakage here is usually due to an aging vacuum pump gasket.
Repair: Replace the vacuum pump gasket. Apply a suitable amount of sealant to the gasket before installation. Ensure proper bolt torque.

4. Oil Filter Base
Inspection: Due to its concealed position, leakage at the oil filter base is harder to observe. Leakage here is usually due to an aging base gasket.
Repair: Replace the oil filter base gasket. This task can be labor-intensive due to limited space. Ensure proper gasket installation and a clean contact surface. Apply appropriate torque to the bolts.

5. Crankshaft Seal
Inspection: Check the crankshaft pulley (front seal) and the area where the engine and transmission meet (rear seal) for oil stains.
Repair: Replace the front and/or rear crankshaft seals. Ensure even pressure around the seal and proper installation depth.

6. Oil Cooler
Inspection: Lift the vehicle and check for oil stains around the oil cooler. Leaks here are often due to aging oil cooler gaskets.
Repair: Replace the oil cooler gasket. Apply a suitable amount of sealant to the new gasket and ensure the oil cooler surface is clean. Properly torque the bolts.

7. Oil Pan
Inspection: Inspect the oil pan gasket area and oil pan bolts for oil stains. Causes of leaks here may include loose bolts, oil pan deformation, gasket aging, or failed oil pan washers.
Repair: Identify the exact fault area and replace the oil pan gasket (with sealant as needed), oil pan, or oil pan bolts. Ensure proper bolt torque.

8. Turbocharger
Inspection: Check for oil stains at the turbocharger oil feed line connection. Leaks may be due to loose bolts, failed gaskets, or deformed oil lines. If there is a small amount of oil in the intercooler hoses (exhaust side), it may indicate internal turbocharger leaks.
Repair: Address the identified fault area with appropriate repairs or replacements. Ensure proper bolt torque. Note that low-viscosity oils may exacerbate internal leaks.
Transmission Oil Leak
Symptoms: Sluggish acceleration, delayed shifting, unusual noises, visible oil sludge.
Hazards: Slipping and increased wear of the transmission.
1. Transmission Oil Lines and Cooler
Inspection: Determine if the leak is from the middle of the line, the connector, or the cooler.
Repair: Tighten the oil line fittings or replace leaking components (cooler, oil lines).
2. Transmission Oil Pan
Inspection: Identify if the leak is from the pan’s sealing surface or from above the pan.
Repair: Apply sealant or replace the gasket, or repair/replace the oil pan.

3. Input/Output Shaft Seals
Inspection: Check for signs of damage, looseness, or hardening of the seals.
Repair: Replace damaged or hardened seals. If worn, replace the entire seal set.
4. Clutch Master Cylinder, Slave Cylinder, or Lines
Inspection: Check if the bolts on the master or slave cylinder are tight, if there is leakage at the piston area, or if the lines are damaged.
Repair: Tighten or replace the master cylinder, slave cylinder, or oil lines as needed.

5. Transmission Case
Inspection: Look for cracks or damage in the transmission case.
Repair: Repair or replace the transmission case as necessary.
6. Drain Plug
Inspection: Check if the drain plug is stripped or not properly tightened.
Repair: Tighten the drain plug or repair/replace the oil pan if necessary.
7. Vent Hole
Inspection: Check if the transmission oil is overfilled.
Repair: Drain excess oil to bring the level to the standard amount.
To be continued....


